


Getting Started on a PC
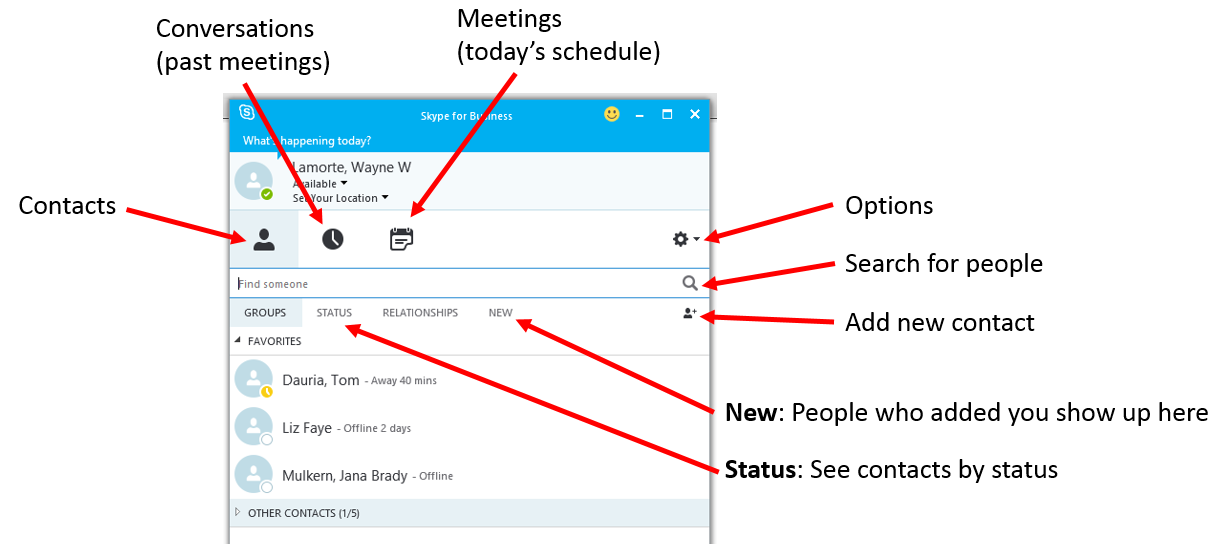
When you open SfB, you should see the window below. Note that there are icons for contacts, conversations, and meetings (your daily schedule). In the image below the "contacts" and "GROUPS" tabs have been selected, as indicated by the light blue shading.
PC Options
The most important items on the options menu are the "Meet Now", "Tools", and "Help" functions. Note that the "Tools" submenu has selections for
- Recording Manager
- Audio Device Settings
- Video Device Settings
- Dial-in Conferencing Settings
- and additional Options
The video below illustrates the controls on the initial window that opens when you start SfB.
Link to a transcript of the video
![]()
![]()
Adding Contacts to SfB Contact List on PC
If you are using Microsoft Outlook for email, contacts, and your calendar, SfB can integrate entries from Outlook quite easily. For example, the "Meeting" icon will show you the entries in your Outlook calendar for the current day.
Suppose you want to add someone on Boston University's Global Address List to your contacts list in SfB. If you have selected the "Contacts" icon (the head and shoulders silhouette), you will see two categories:
- Favorites
- Other contacts
The search box in the SfB Contacts screen says "Find someone." Type the name of someone in the BU directory into the box, then right-click on the person you want to add, and select either "Add to Favorites" or "Add to contacts," which will give you the option to add them to "Other Contacts."
Creating a New SfB Group
By default SfB creates two groups: "Favorites" and "Other Contacts". However, you can create and define your own groups. Suppose, for example, that I wanted to create a group that consisted of all of the students in my EP713 class.
From the Contacts screen in SfB, I would click on "Groups" and then click on the "add" icon on the right. This will produce the following:
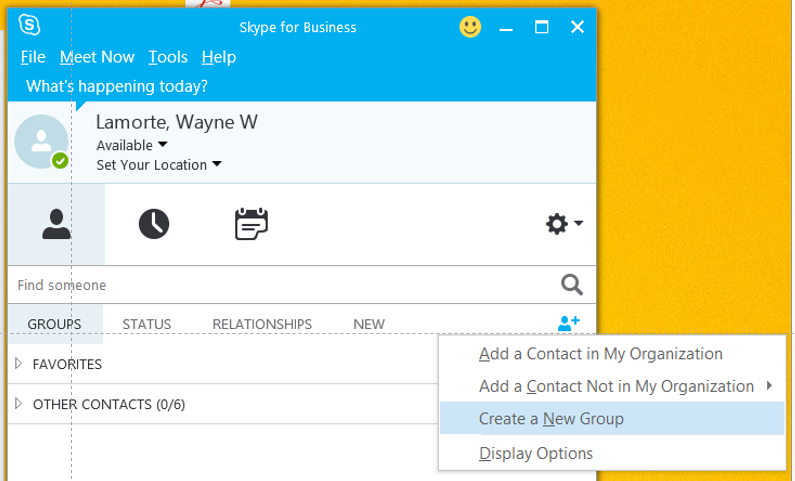
I would select the "Create a New Group" option and then procede to add the individual students to that group.
Selecting and Checking Your Microphone
That at the lower left corner of the SfB window there is a small icon with a blue monitor and black speaker. If you click the chevron to the right of the icon, the menu below will pop down, although the By may be different depending on your computer's available audio devices.
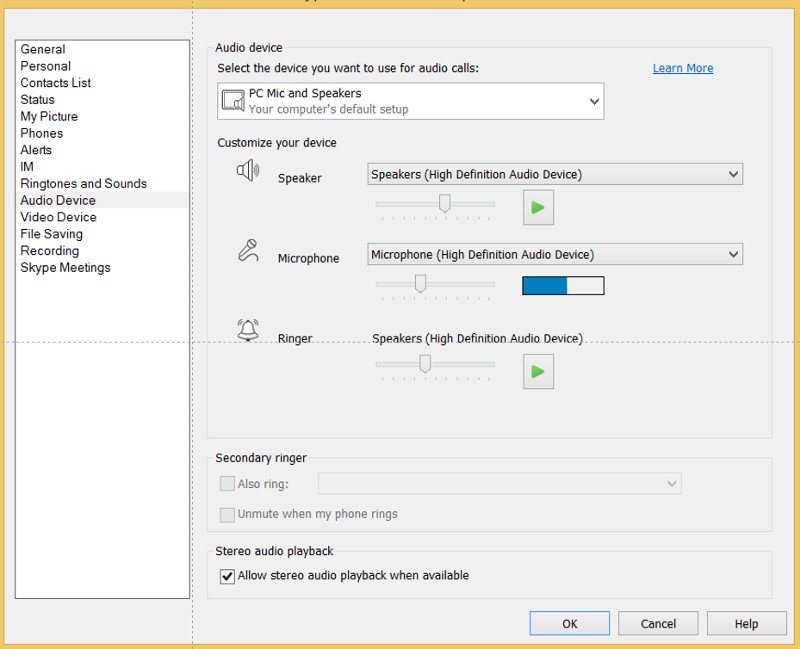
If you select "Audio Device Settings, you will see the screen below, which defaults to showing the "Audio Device", i.e., the microphone that is selected. If your microphone is functioning, you should see an indication of the volume from the width of the horizontal blue bar that appears when you speak into the microphone. There are other options that can be accessed from the menu on the left, but it is very unlikely that you will need to change any of these settings.
 ,
,
The brief Microsoft video below (1:44) shows how to test and make changes to your audio and video devices.
![]()
![]()