Inside the Online Meeting on a PC
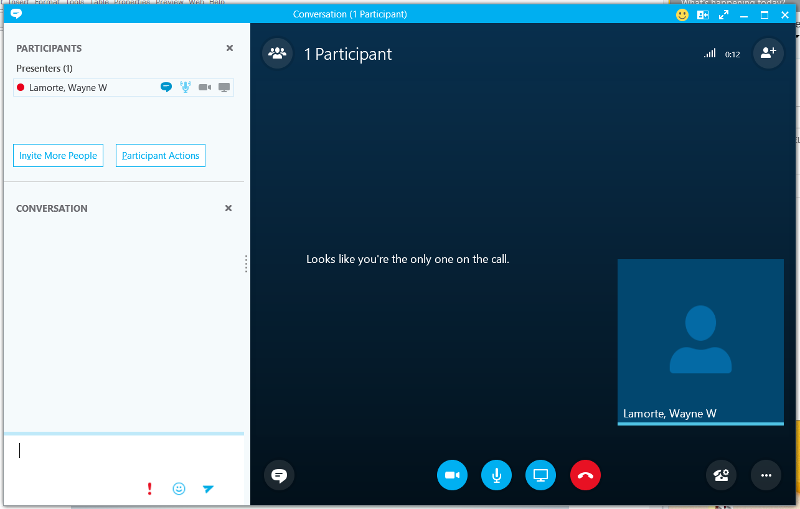
When you first enter the SfB meeting you have created, you will see a fairly empty screen. The following options are available to begin setting up the meeting and creating usable content:
- The PARTICIPANTS window, which can be expanded or collapsed on the left by selecting the participant's list icon.

- The CONVERSATION window, which can be expanded or collapsed on the left by selecting the IM icon.

- The main meeting area, which contains settings at the top and bottom of the window.
Participants and Instant Messaging Window
The space on the left will list the meeting participants. The instructor's name should be marked as "Presenter." Next to your name should be icons indicating the status of the following components:
 IM (enabled/disabled)
 Microphone (muted/unmuted)
 Web Cam (on/off)
 Presentation (on/off)
These icons will appear next to each of the participants who enter the meeting, and you (as the host) can control their microphone and web cam privileges by selecting the icons next to their name.
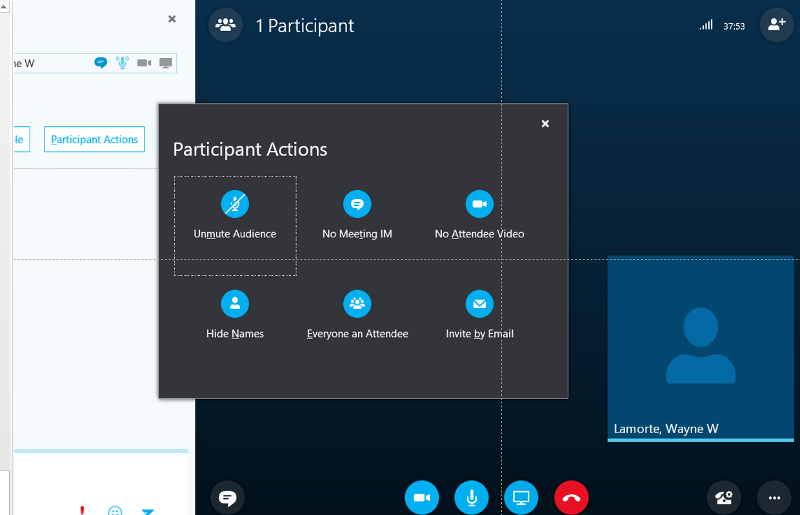
Under PARTICIPANTS, you can also invite others and control participant actions using the following buttons:
- Invite More People takes you to the contacts section of SfB.
- Participant Actions provides options including muting/unmuting the entire audience, turning off/on the IM (instant messaging), turning off/on the web cams of the participants, hiding the names of the participants, and inviting participants by email.
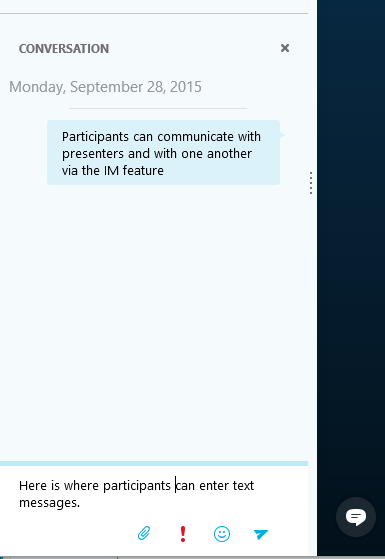
CONVERSATION is the instant messaging (IM) window which allows presenters and the participants to communicate via text messages. To send a text message to participants, enter it into the lowermost part of the window and select Enter to submit it.
Presentation Window Icons for PC
In the meeting presentation window, there are several icons located at the bottom of the window.

- IM expands and collapses the IM window.
 Web Cam turn your web cam (if you have one) on and off.
 Microphone allows you to mute (or unmute) your microphone. If your microphone is muted, there will be a diagonal line across the icon.
 Presentation provides a number of presentation options that will be described in detail on the next page.
 Exit allows you to "hang up" and exit the meeting.
 The phone icon on the left is largely irrelevant for us since it controls dial in options for audio. Most of us will be using Voice Over IP (Internet audio via the computer or tablet).
 Ellipsis is the icon for more options. Selecting it will provide the following additional options:
- Start Recording turns recording on and creates a message on the screen alerting users that the session is being recorded. Announcing that the session is being recorded is recommended as well. To STOP recording, select More Options again, and the first option will now be Stop Recording.
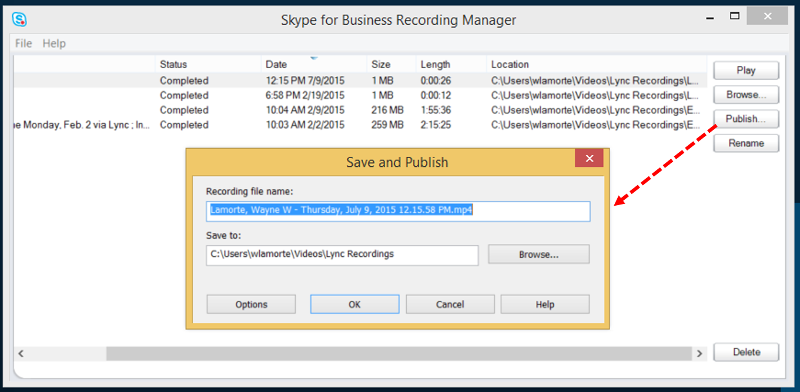
- Manage Recordings provides access to saved recordings. When you initiate recording, the video is saved on your local computer as an .mp4 file. The recording manager allows you to play recordings, browse the folder where your recordings are stored, and publish, rename, or delete recordings. Selecting Publish to choose a specific folder to save recordings.
- IM Text Display Size can increase or decrease the size of IM text.
- Change Font allows the font of the IM to be modified including color, size, and type.
- Meeting Entry Information includes the name of the meeting organizer as well the the meeting URL.
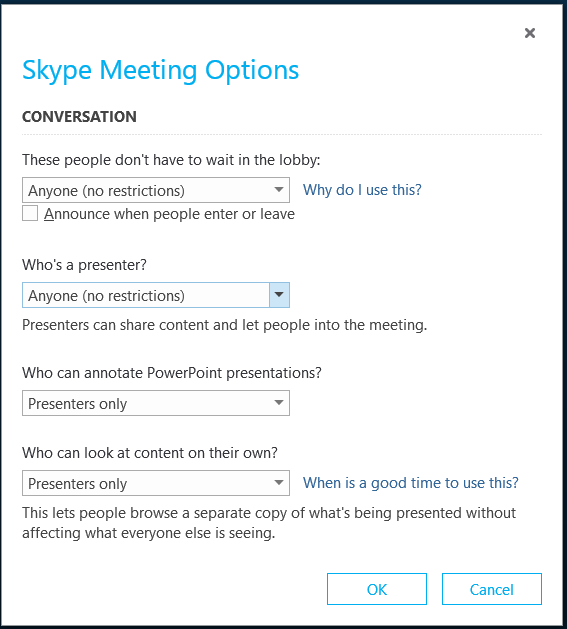
- Skype Meeting Options offers additional permissions and/or restrictions for participants including who can be a presenter, annotate PowerPoint presentations, and look at content independently.
- End Meeting ends the SfB online meeting. An alert window will open asking if you are sure you wish to end the meeting.
- Skype for Business Help provides some additional instructions and guidance.