How to Use Microsoft Office Mix
Kenith Wilson, Educational Technologist, Educational Media Support Center, Boston University Medical Center
Wayne LaMorte, Office of Teaching and Digital Learning, Boston University School of Public Health
Microsoft Office Mix is a relatively new software product that allows you to easily turn you PowerPoint presentations into interactive lessons.
The video below gives an overview of what Mix can do for you.
This link brings you to a series of tutorials illustrating the learning modules that you can create with Microsoft Office Mix .
For updated requirements see the official Microsoft web page https://officemix.uservoice.com/knowledgebase/articles/349393-on-which-devices-can-i-watch-a-mix-can-i-watch-mi
Notes:
![]()
You can download Microsoft Mix for free if you have a Boston University account with a Kerberos password or if you have a Microsoft account. Go to https://mix.office.com/ , click on "Get Office Mix", and select which way you want to sign in.
Office Mix should install Mix as an "Add-In" to your PowerPoint.
Start PowerPoint and select the Mix tab from the menu bar at the top.
![]()
You should then see the Mix menu options shown below.
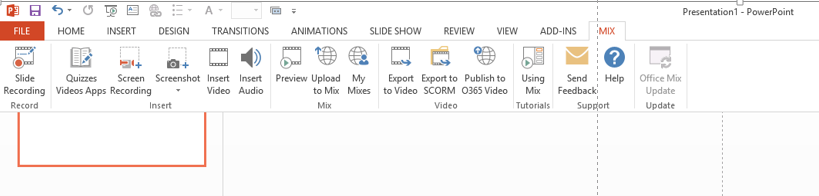
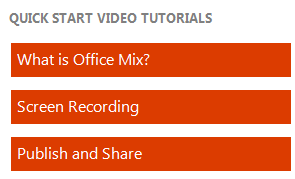
You may also see links to "Quick Start Tutorials on the right side of your screen. If you don't, click on the "Using Mix Tutorials" option on the Mix menu at the top.
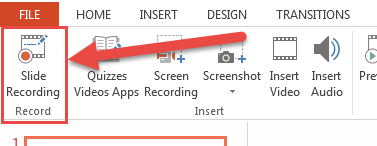
This is a very useful option. It allows you to record audio and/or video of your PowerPoint slides while you narrate them and annotate them using your mouse or other pointing device as a pen. The audio and video can then be reviewed and saved to the cloud or directly to your local computer as a .mp4 file. You can start with a blank slide and annotate it to create a Khan Academy type presentation, or you can retrieve a previously saved PowerPoint presentation and narrate it while making annotations. To start, click on "Slide Recording" at the upper left corner.
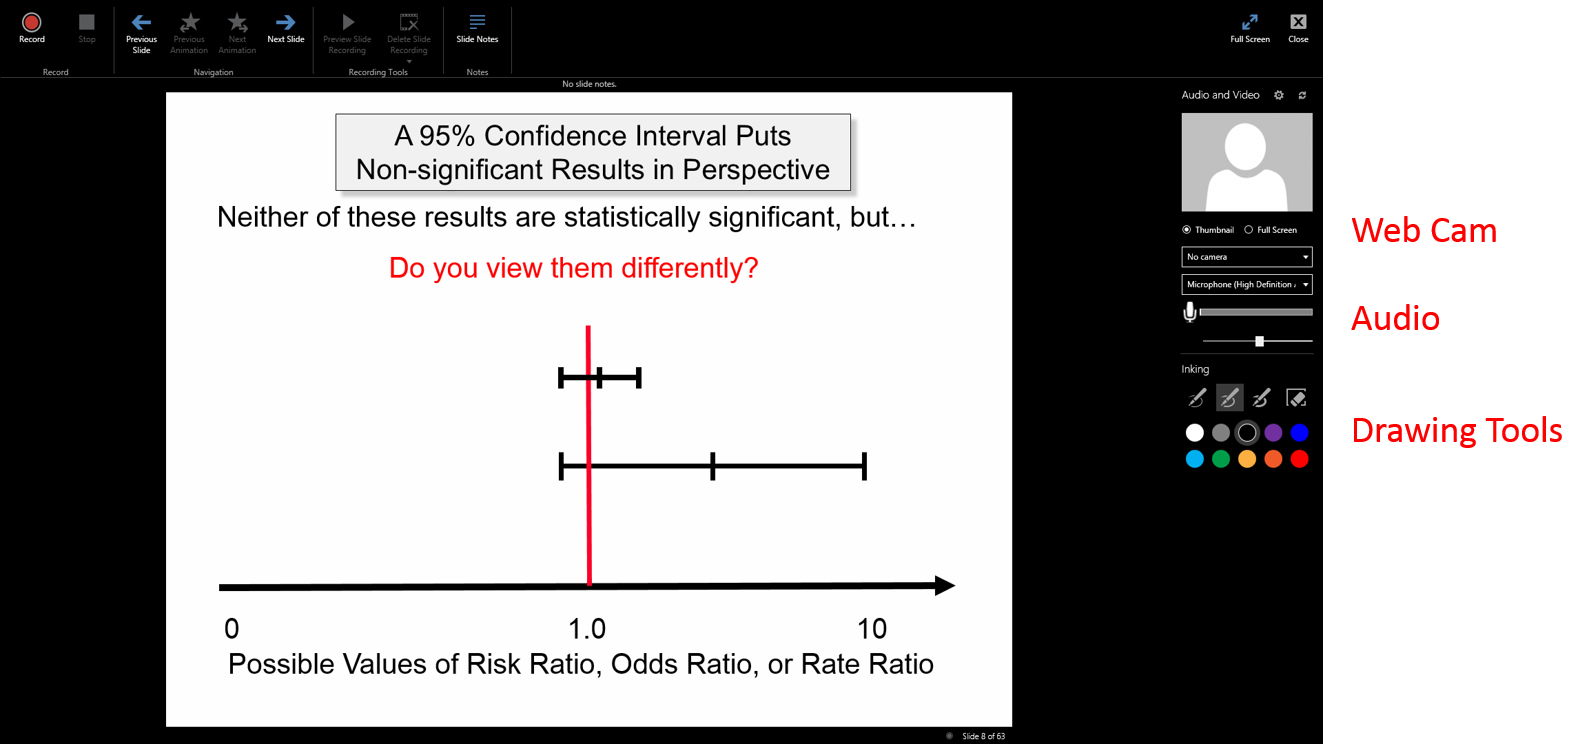
This should open a screen like the one below (I already have chosen a PowerPoint slide in this illustration.)
Note the "Record" and "Stop" buttons at the upper left and web cam and audio controls on the far right. You can choose just audio or audio + video (meaning recording your voice and your web cam), and you can choose whether the web cam video will play as a thumbnail insert or full screen. The microphone icon shows the volume of your audio when you speak, and the slide bar beneath that allows you to adjust the volume.
Beneath that are pens of different thickness and options for pen color. Note that the pens and eraser will not become functional until you begin recording.
To begin recording, click on the red "Record" button at the upper left. You will then see your drawing tools arrayed vertically on the right as shown below. The drawing tools and the eraser should now be functional.
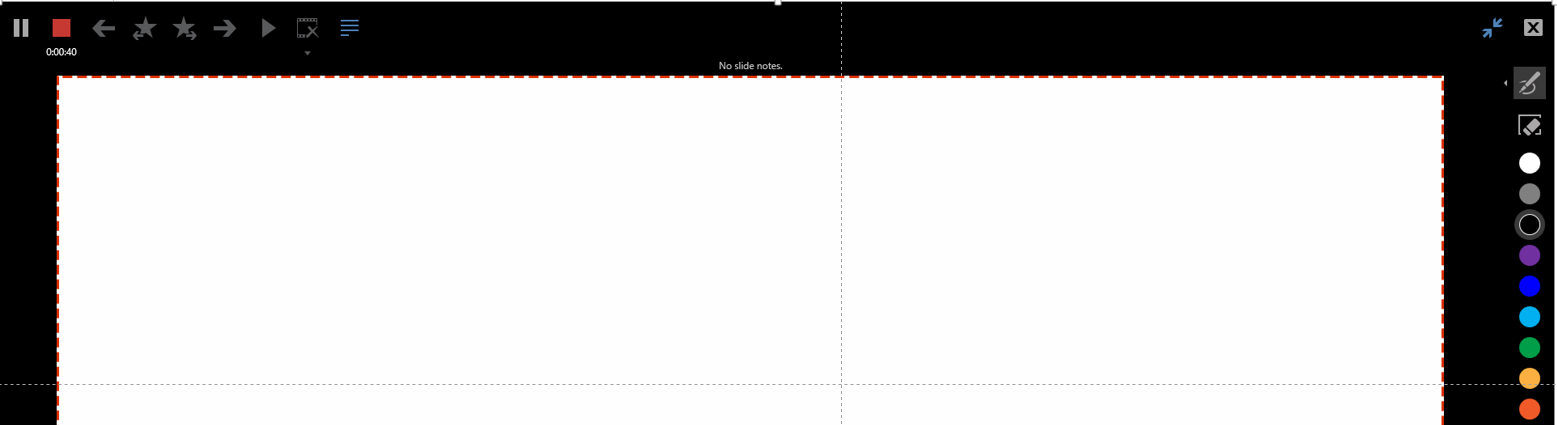
The controls at the upper left, ![]() enable you to pause/resume or stop recording.
enable you to pause/resume or stop recording.
Note also that when you are recording a PowerPoint presentation with multiple slides and animations, the recording screen provides buttons to activate an animation if it is present on a given slide, and another button enables you to advance to the next slide. These controls are shown below.

When you are done, click the ![]() button at the upper right to close the recording screen.
button at the upper right to close the recording screen.
This will bring you back to the Mix menu, where you can choose the Preview button  to review your recording. When you are satisfied, you can upload it to OneDrive with this button.
  Once the file has been uploaded, you can choose with whom you would like to share it.
Alternatively, you can export it and save it as a .mp4 file on your local computer by clicking on this button  . Note that processing and saving these files may take some time depending on the length of the presentation and the resolution that you choose for the video.
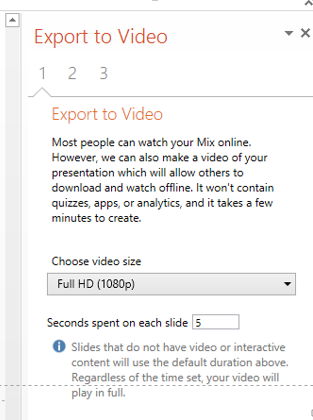
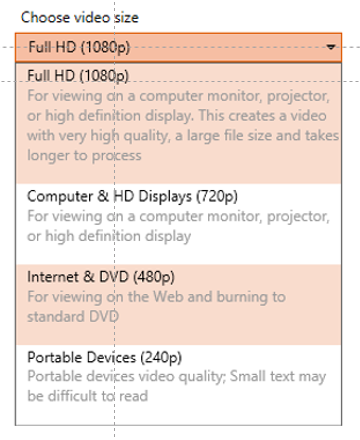
When you choose to export the recording, you will first get the screen on the left below. Note that the default is "Full HD with 1080" pixels. If you click on the chevron to choose video size, you get the options shown on the right below.
The video below shows how to create short narrated screen recording and embed it into your PowerPoint presentation.
We recorded the next video to illustrate screen capture with Excel. We then previewed the recording and exported it as a .mp4 file at a resolution of 480 pixels.
If you post PowerPoint slides for your students to review, another potentially useful option is to insert interactive quiz questions into the PowerPoint file. Students can then look at the slides in slide show mode online or after they have downloaded them, and the quiz questions will provide an interactive feature.
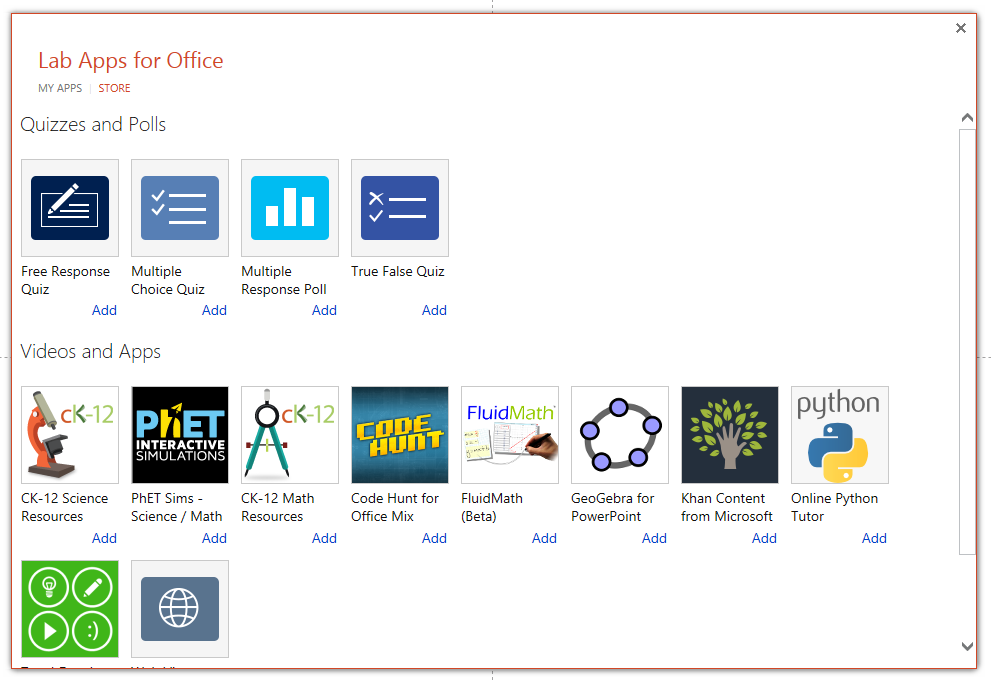
From the Mix menu click on the Quizzes button. 
If you are not brought to the "store" automatically, click on the button to go to the online store. Note that you can choose several types of questions, and there are also options to insert videos.
The video below is a brief tutorial on how to insert quiz questions into a PowerPoint presentation.
The link below will open an 11 slide PowerPoint file in which slide #9 has a multiple choice question, slide #10 has embedded questions on ratios from the Khan Academy collection, and slide 11 as an embedded video on influenza vaccines from the Khan Academy (downloaded from the "Lab Apps Store.")
Link to Demo Quiz in PowerPoint