
Blackboard Tips for Instructors & Teaching Assistants
This module provides an introduction to faculty and teaching assistants on some of the more useful features of Blackboard.
This short video shows how to request creation of a new Blackboard site for a new course, or request that an old Blackboard site be copied into a new semester. (2:05)
Note that if you want to copy another instructor's site (say, section A1) into a new site for your (e.g., section B1), you will have to submit a request ticket to the BUMC Help Desk.
When your new course is initially created, it is unavailable to students. You need to make it available by going to "Customization"
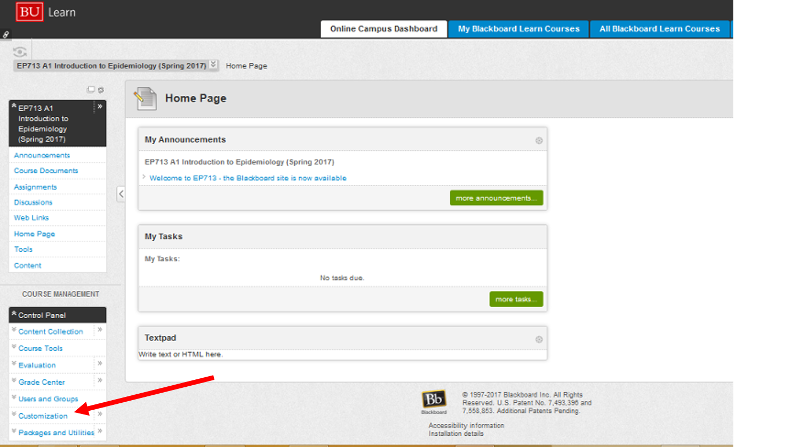
and then select "Properties.".
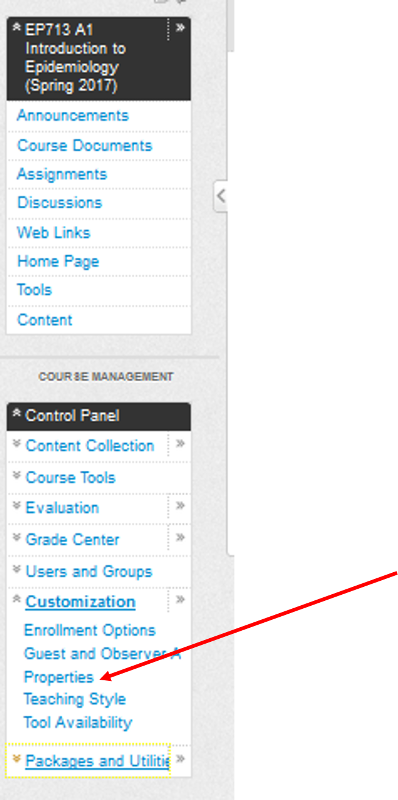
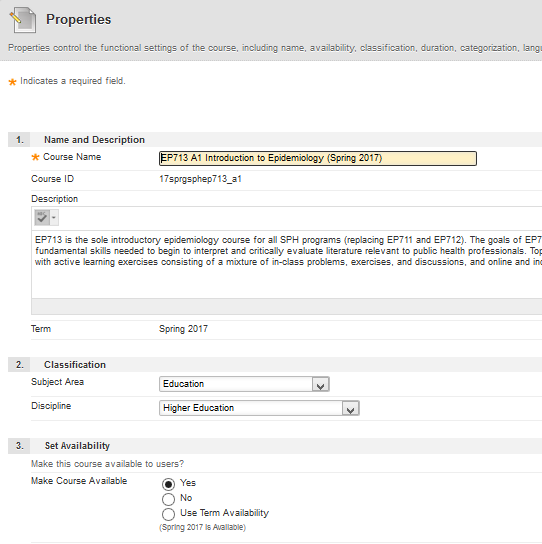
The next window will allow you to make the course available to registered students.
All of your past Blackboard sites are saved in an archive. This video shows how to manage the archive and retrieve old sites on which you were listed as instructor, course builder, teaching assistant, etc. (2:33)
This video provides a basic orientation to a typical Blackboard site. (5:29)
The video below demonstrates how to post announcements and send them as emails. (1:49)
Students who register on time are added to your course roster automatically, but students who register late need to be added by you manually. In addition, you need to manually add teaching assistants, co-instructors, and anyone else who is not registered. Also note that when students register but then drop the course, they will remain in the roster until you manually remove them The video below will show how to make additions and deletions. (1:43)
This video shows how to create and maintain the Discussion Board. (2:52)
The next video shows how to add content such as PDF files and Word files. (5:51)
Videos can also be posted on your Blackboard site by clicking on "Build Content" and then selecting "Video."
One small caveat is that videos will play automatically when viewed using Firefox because of a default setting in the Firefox configuration. So, if you post a video in Course Documents, it will play automatically whenever Course Documents is opened. Moreover, if you post two or more videos in the same folder, they will all autoplay simultaneously whenever the folder is opened. IT is aware of this problem, but it has not been resolved as of this writing. The best solution for now is to place each video in its own subfolder. Then the video will autoplay, but only when the subfolder is opened. [An alternative solution is for the user to manually disable the Firefox autoplay configuration. To do this the user must open Firefox and type: about:config in the address bar, then search for media.autoplay.enabled. When that comes up, the user clicks on the setting to disable the autoplay feature.]
Videos do not autoplay when Chrome or Safari is used as the browswer, but videos also don't open in Chrome because it doesn't support the plugin used to play the video. In order to watch the video in Chrome, the viewer needs to download the video and play it in a computer application.
The video below describes how to create quizzes with automatically graded questions, such as multiple choice, multiple answer, and true/false questions. (12:14)
In addition, one can create quizzes that include short answers and essays, but these, of course need to be graded manually.
This video shows how to create an anonymous survey, for example, a mid-course evaluation to get feedback from your students. (6:46)
It also illustrates a mid-course survey that I use that I can download and send to anyone interested in using mine. You can very easily import the survey and then edit it to make whatever changes you wish. The video on the Gradebook will show how to rapidly get a summary of the results of a survey.
Turnitin software is integrated into Blackboard Learn. It is best known as a very effect tool for checking for plagiarism, but it offers powerful advantages for providing effective feedback to students on their writing assignments. The link below is to a short video produced by Turnitin illustrating its functions.
http://www.turnitinuk.com/en_gb/what-we-offer
This next video is a short tutorial from Northwest College that provides a succint overview of the tools within Turnitin.
You can create a Turnitin assisgnment anywhere in Blackboard as illustrated in the short video below.
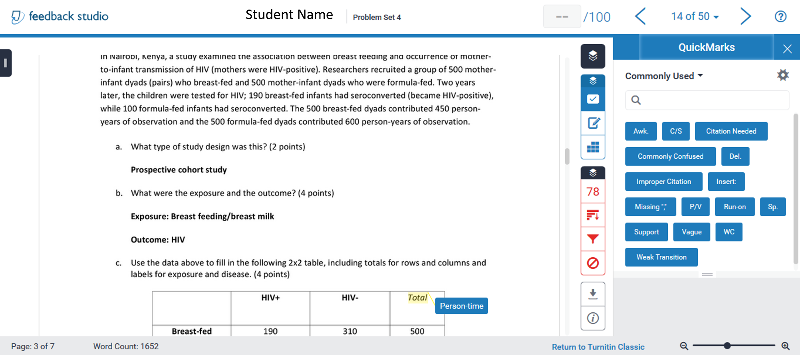
Once students submit Turnitin assignments, they will appear in the gradebook as items that need to be graded. You can or your grading assistants can go to the gradebook and select the submitted assignment for a paricular student by clicking on the chevron on the right of that assignment and selecting the link that says, for example, "Attemplt 10.16.16". This will take you to a page on which you can select "User's Paper" or the "Originality Report" under item #2. Selecting the Originality Report will enable you to gauge plagiarism, and selecting User's Paper will enable you to grade the paper and provide feedback that the student will be able to see.
When you open a students paper for grading, you will see something like the example below. In this example I clicked on the blue comment called "Risk difference cases" and that opened up the comment window just above it, indicating the point deduction and the reason for it.
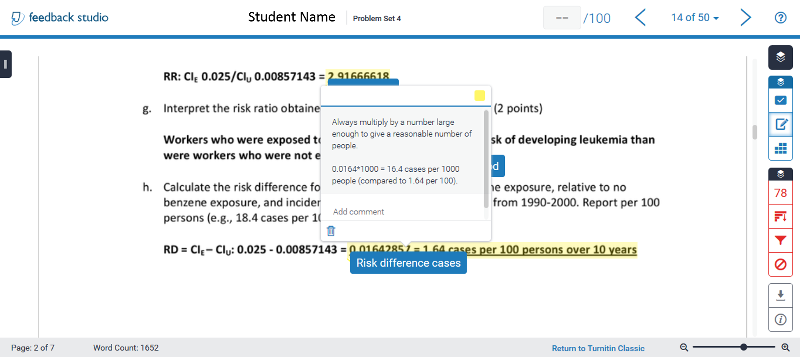
The grader has indicated grade deductions and comments, as illustrated. Note also that there are icons on the right that indicate options for providing feedback. The Quikmarks icon opens the following options:
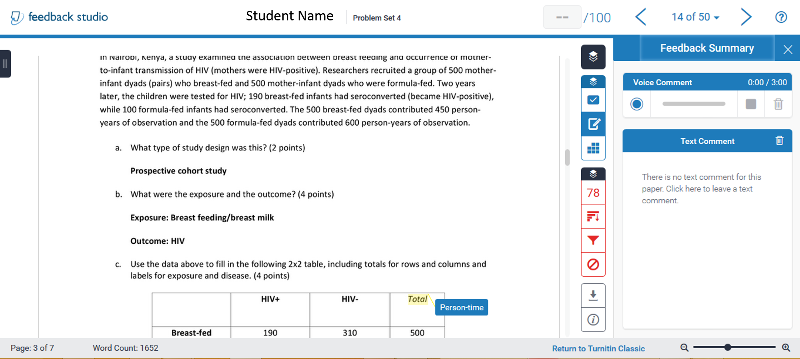
There is also a way to provide summary feedback as shown below.
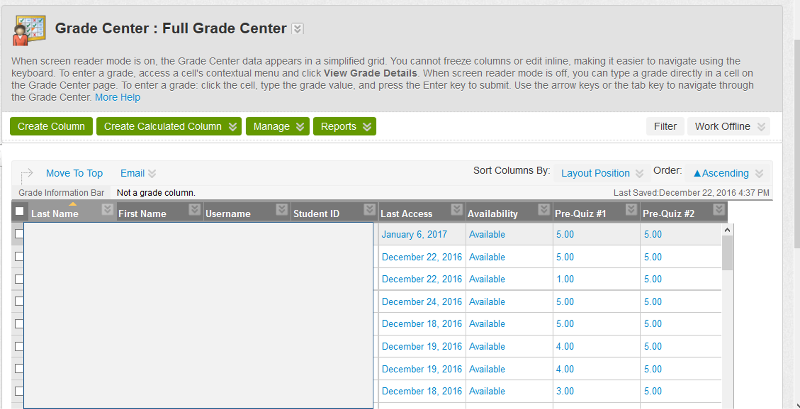
If I'm interested in grades or grading of assignments, I go to the Control Panel and select the "Grade Center" option and then select "Full Grade Center" in that category. Tha opens the Gradebook, which look something like the image below, except that I have covered the names and ID numbers of the students.
The video below provides a an overview of some of the grade book functions. (5:39)
At the end of the semester, I like to download the entire grade book to an Excel spreadsheet and compute the semester grades from there. To download it, go to the full Grade Center and click on the button on the right side of the screen that says "Work Offline". Then follow the instructions to download the grade book. Then save it as an Excel workbook, which you can use to compute semester averages and grades.